
How to Get the Currently Playing Song using the Spotify Node.js API & TypeScript
Intro
When I first started building khalilstemmler.com, I stubbed out a component to present the current song that I was listening to on Spotify. Y'know, I just wanted to add a neat little feature to make the site a little bit more unique.
Fast forward eight months, and it's still not hooked up. After about four attempts, I've finally gotten the hard part down (integrating with the API). At some point, I might code the React component.
This fun Spotify feature is part of my Personal Data Graph.
The reason I need a Personal Data Graph for this feature is, to fetch authenticated user resources from Spotify, the service that asks for the data needs to be, well- authenticated... as me.
The docs from Spotify's Authorization Guide told me that I needed to use the Authorization Code approach, one of 3, to make this work.
I'm going to plow through this process and show you, very imperatively, the steps involved to authenticate a backend service to act on your behalf to fetch your currently playing song from Spotify.
Prerequisites
You're going to need to be using Node version 10x or higher for this to work. The reason for that is because the code that talks to Spotify relies on the URLSearchParams global.
Installation and Setup
Clone or fork my repo over at https://github.com/stemmlerjs/stemmlerjs-graph to follow along.
Run the following commands to clone, install, and set up the project.
git clone git@github.com:stemmlerjs/stemmlerjs-graph.git
cd stemmlerjs-graph
npm install
mv .env.template .env
Creating a Spotify Developers Account
Go to the Spotify Developers Dashboard and sign up for an account.
When you're all signed up, you'll get to the Spotify Developers Dashboard that shows your applications. Click "Create An App".
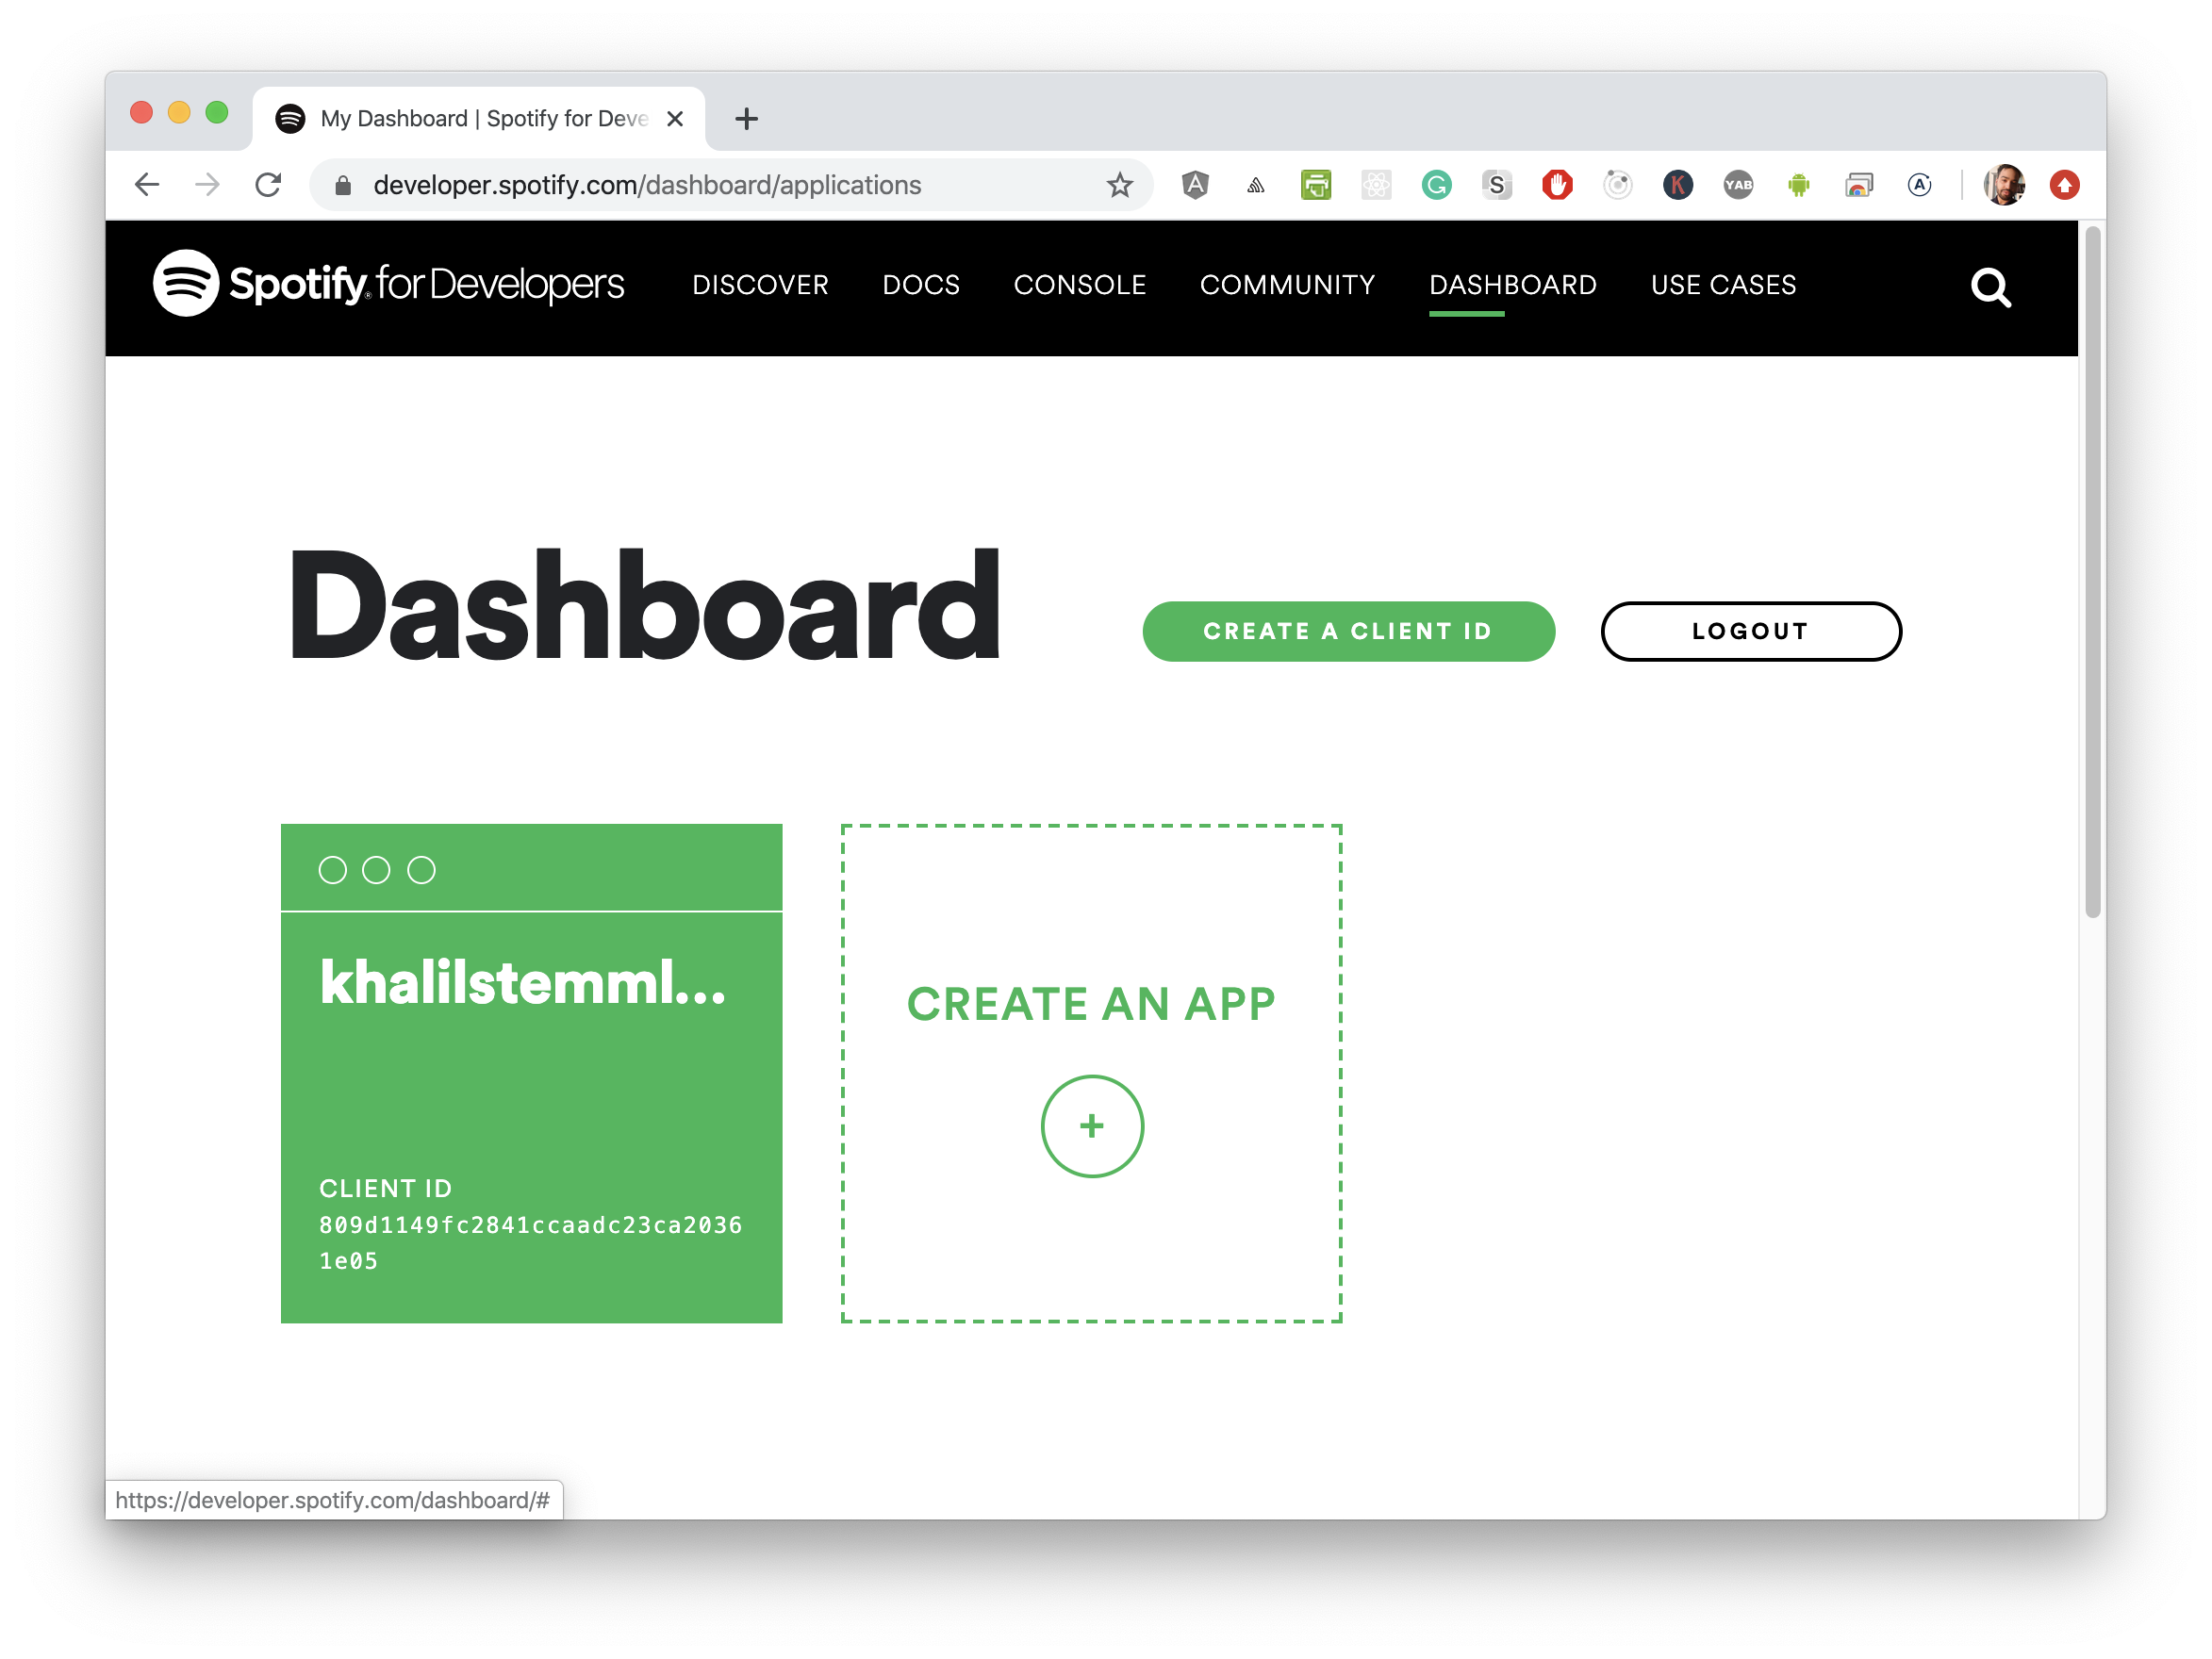
Spotify Developers Dashboard. You won't have an application already when you sign up the first time.
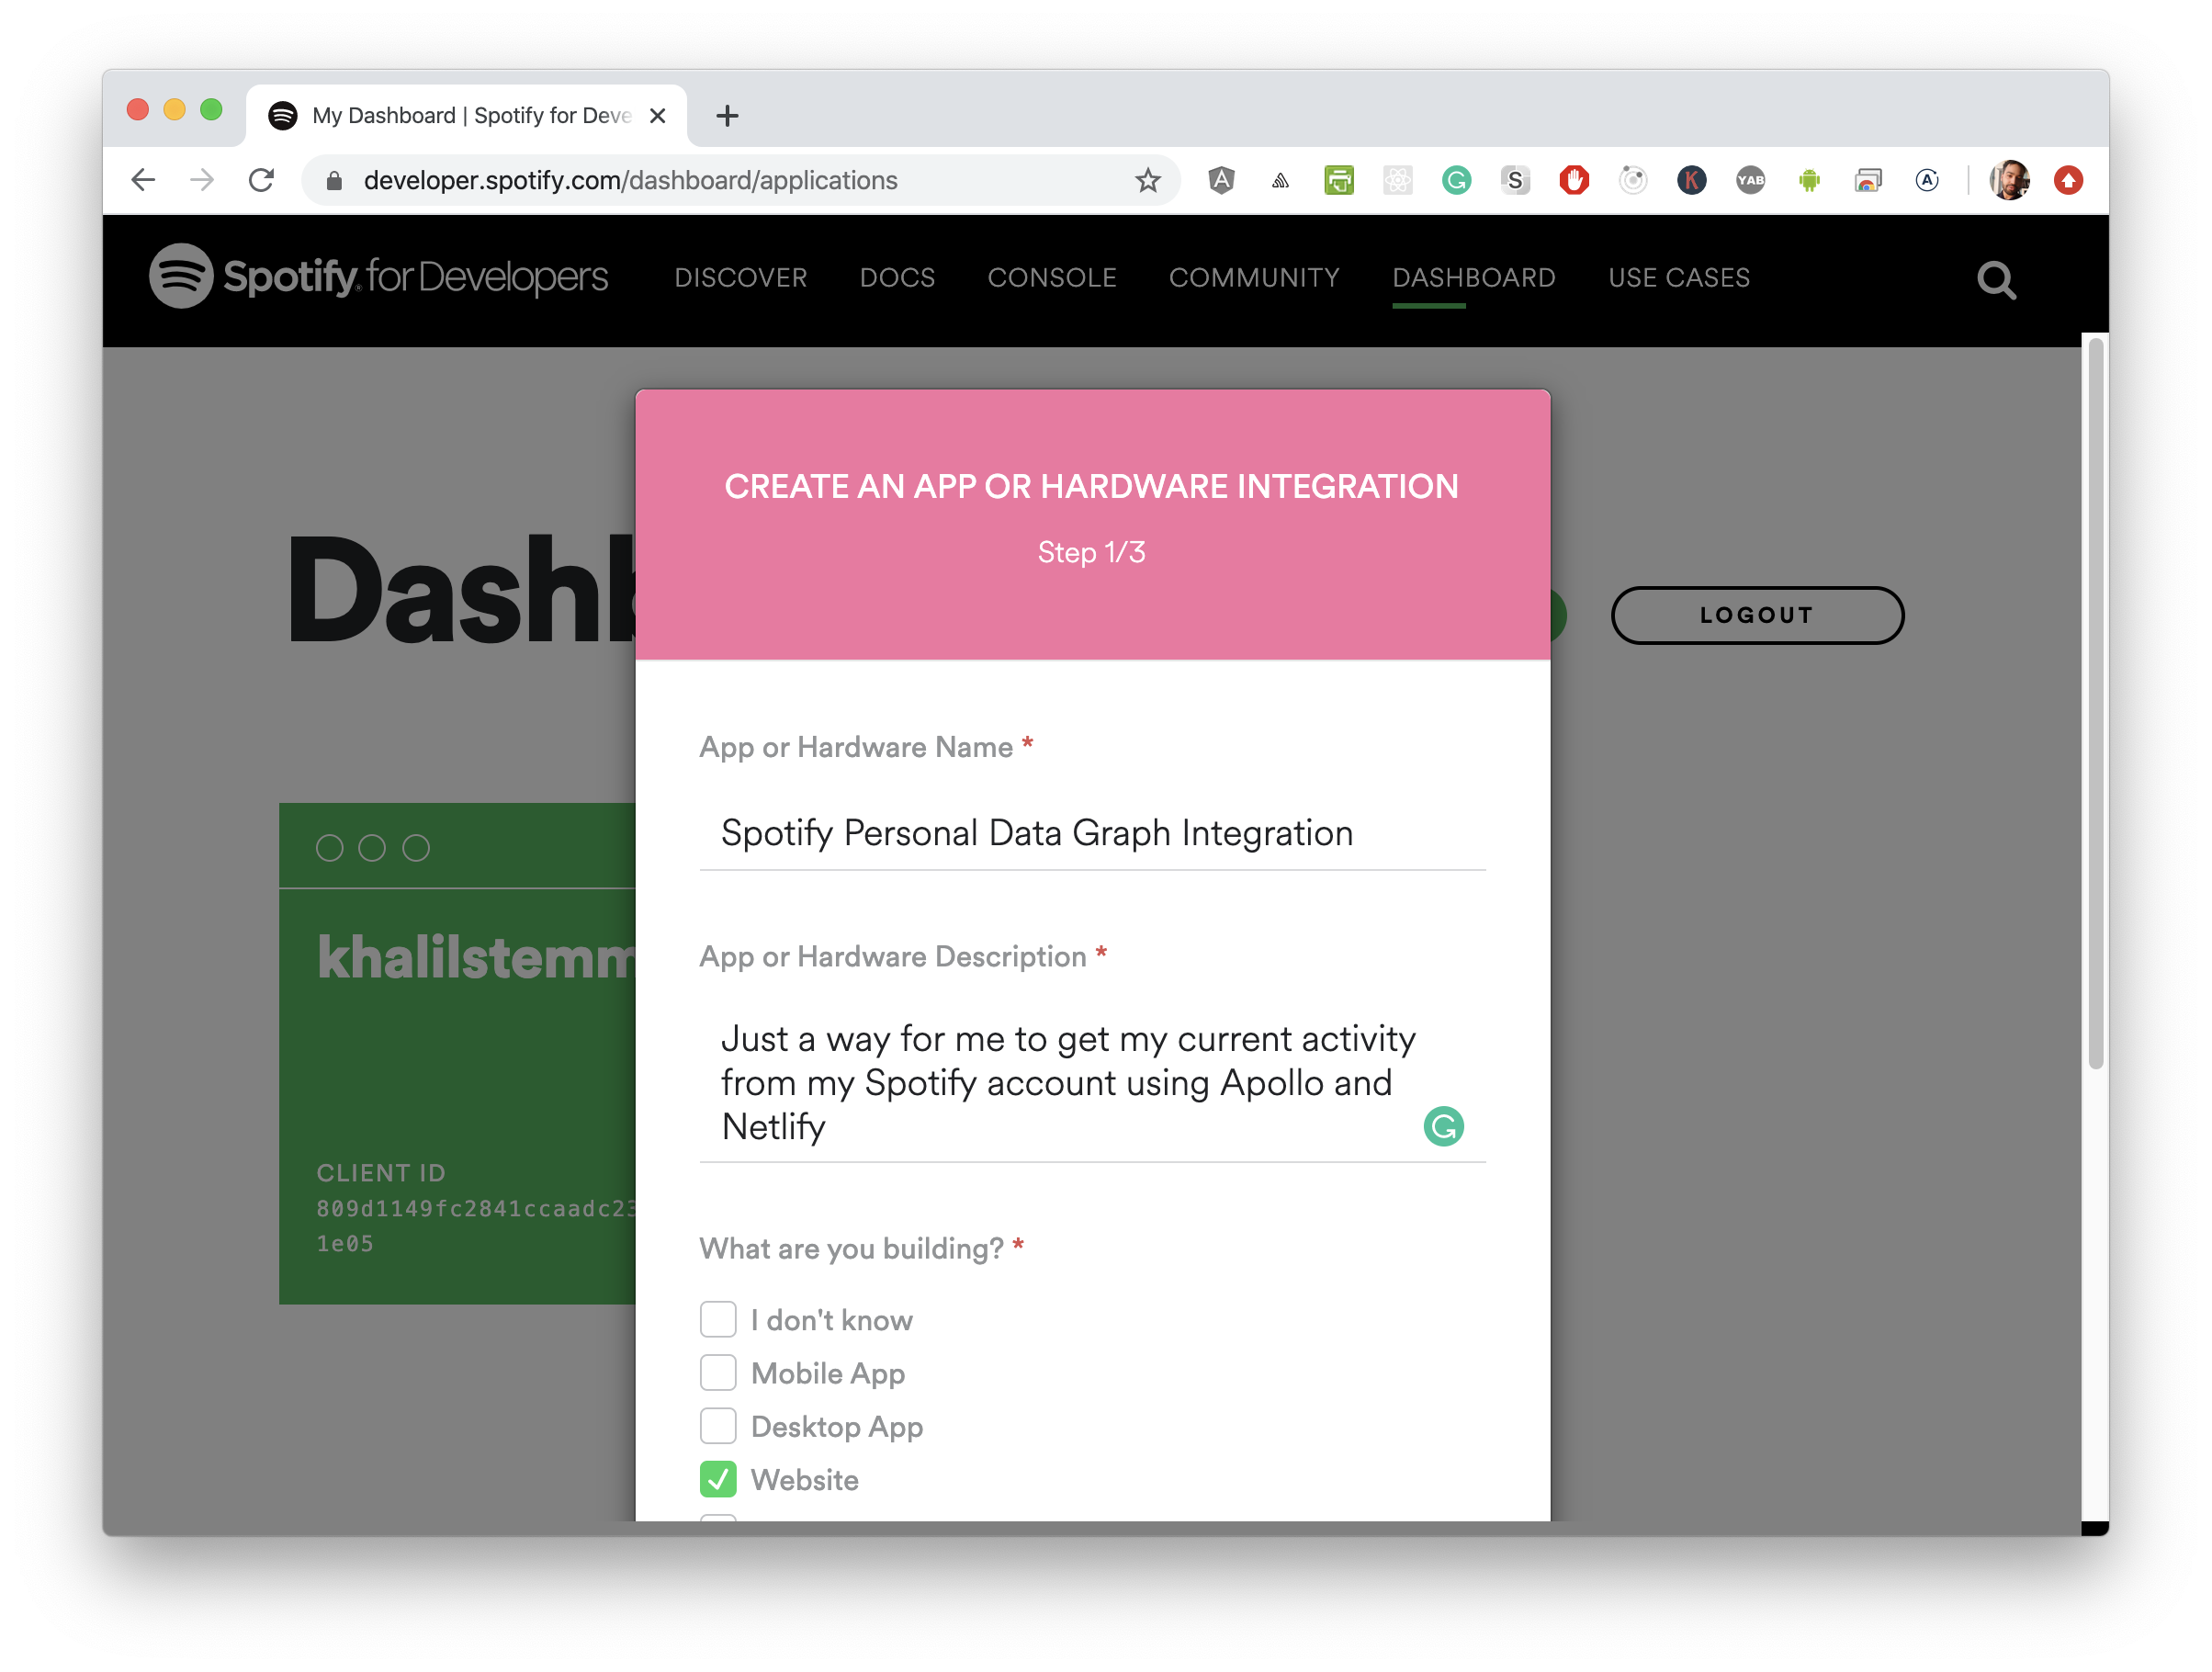
Follow the prompts and select Non-Commercial for the type of integration that we're creating (if you are creating a non-commercial app, that is).

Getting your Client ID and Client Secret
When you log in, you should be able to see your Client ID. Underneath it, you can click to see your Client Secret.
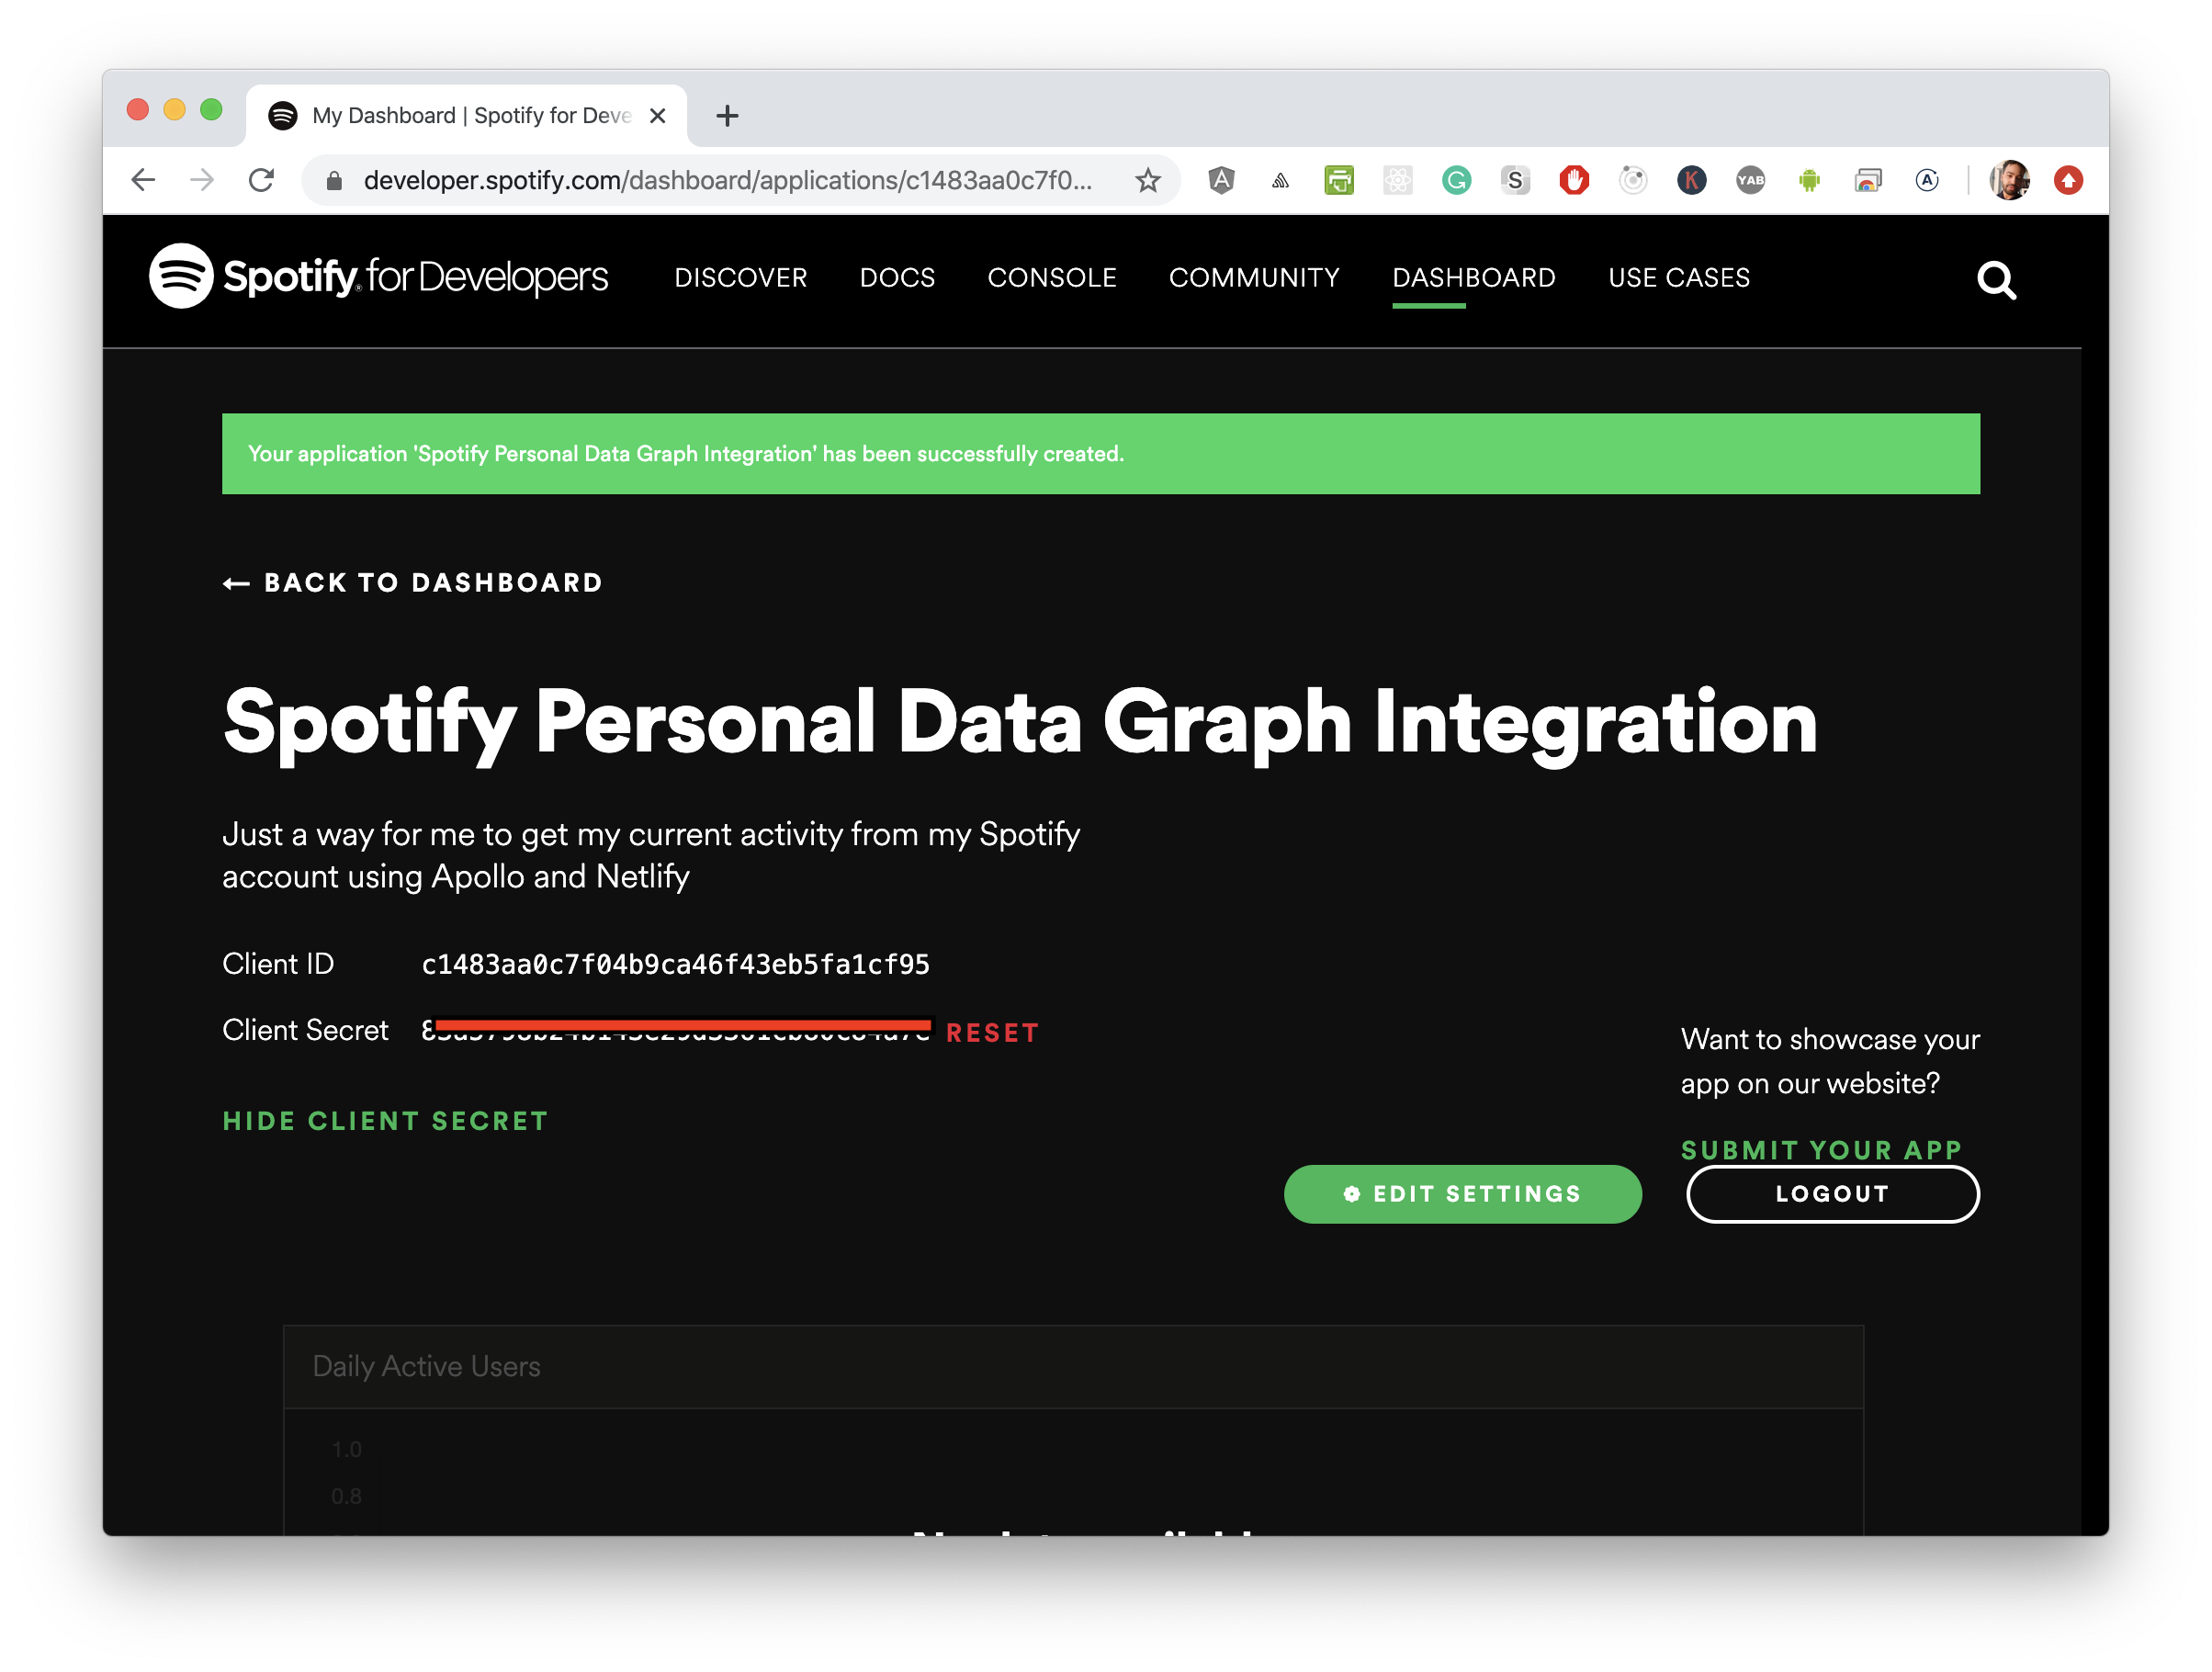
First homework on the repo you cloned is to go into the .env file and supply the Client ID and Client Secret into the file for SPOTIFY_CLIENT_ID and SPOTIFY_CLIENT_SECRET.
SPOTIFY_CLIENT_SECRET= # paste here
SPOTIFY_CLIENT_SECRET= # paste here as well :-)
Setting up our application
Now we need to configure the application with the website and redirect URI.
On the dashboard page, click "Edit Settings", and a modal should appear.
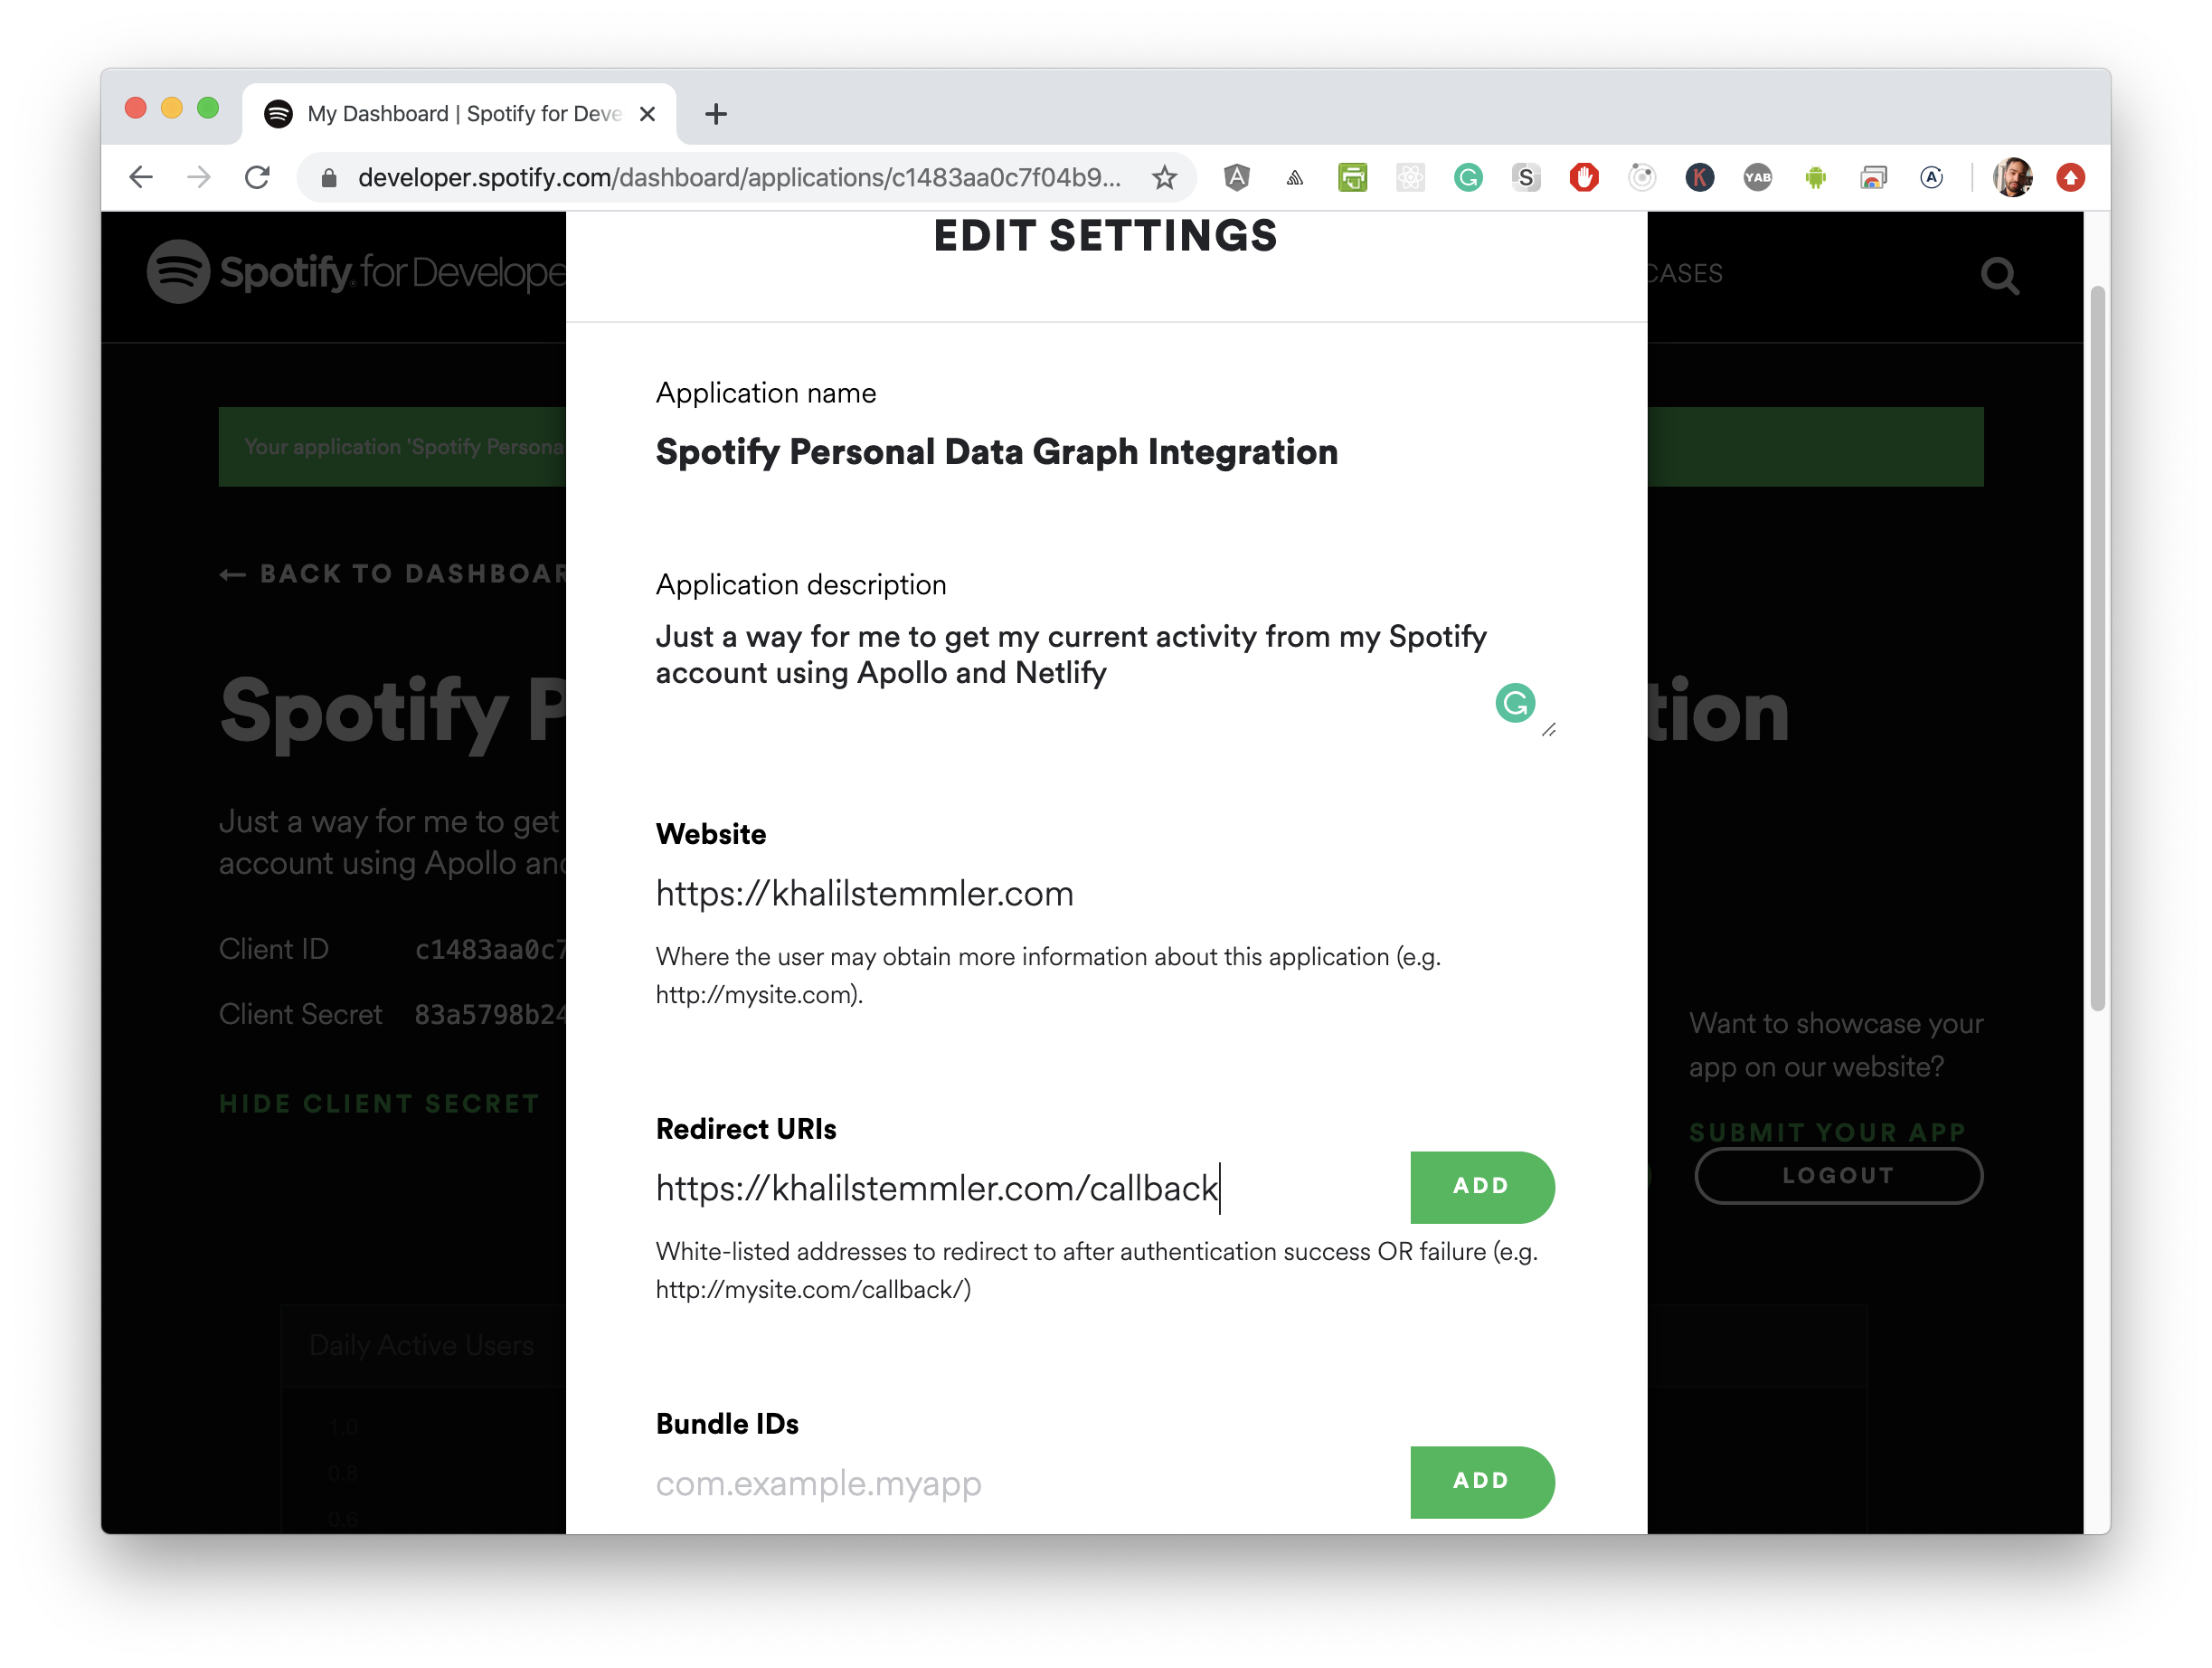
Configuring the Website
For website, you don't need to have a website up and running yet, so just put in the name of a website that you own.
If you don't own a website, you can use google.com.
Configuring the Redirect URI
This is where Spotify sends us after we've logged in. They send us to the URL that we supply, but also give us back an authorization code. We use that authorization code to get an access and refresh token.
If you have a website, you can put any URL from your domain here, and Spotify will redirect us there after logging in.
If you don't have a website, again- that's OK, we can use http://google.com/callback or something, but do understand that the domain that owns the website that we redirect to is fully capable of reading the authorization code we receive.
When you enter your Redirect URI, don't forget to press the "Add" button beside the URL, and THEN click "Save". That's how attempt #1 of hooking this up failed for me - though you're much smarter so that won't happen to you.
Whatever you've provided as the Redirect URI, make sure to update the .env with this as well.
...
SPOTIFY_REDIRECT_URL=https://khalilstemmler.com/callback # For example
Getting the initial Authorization Code
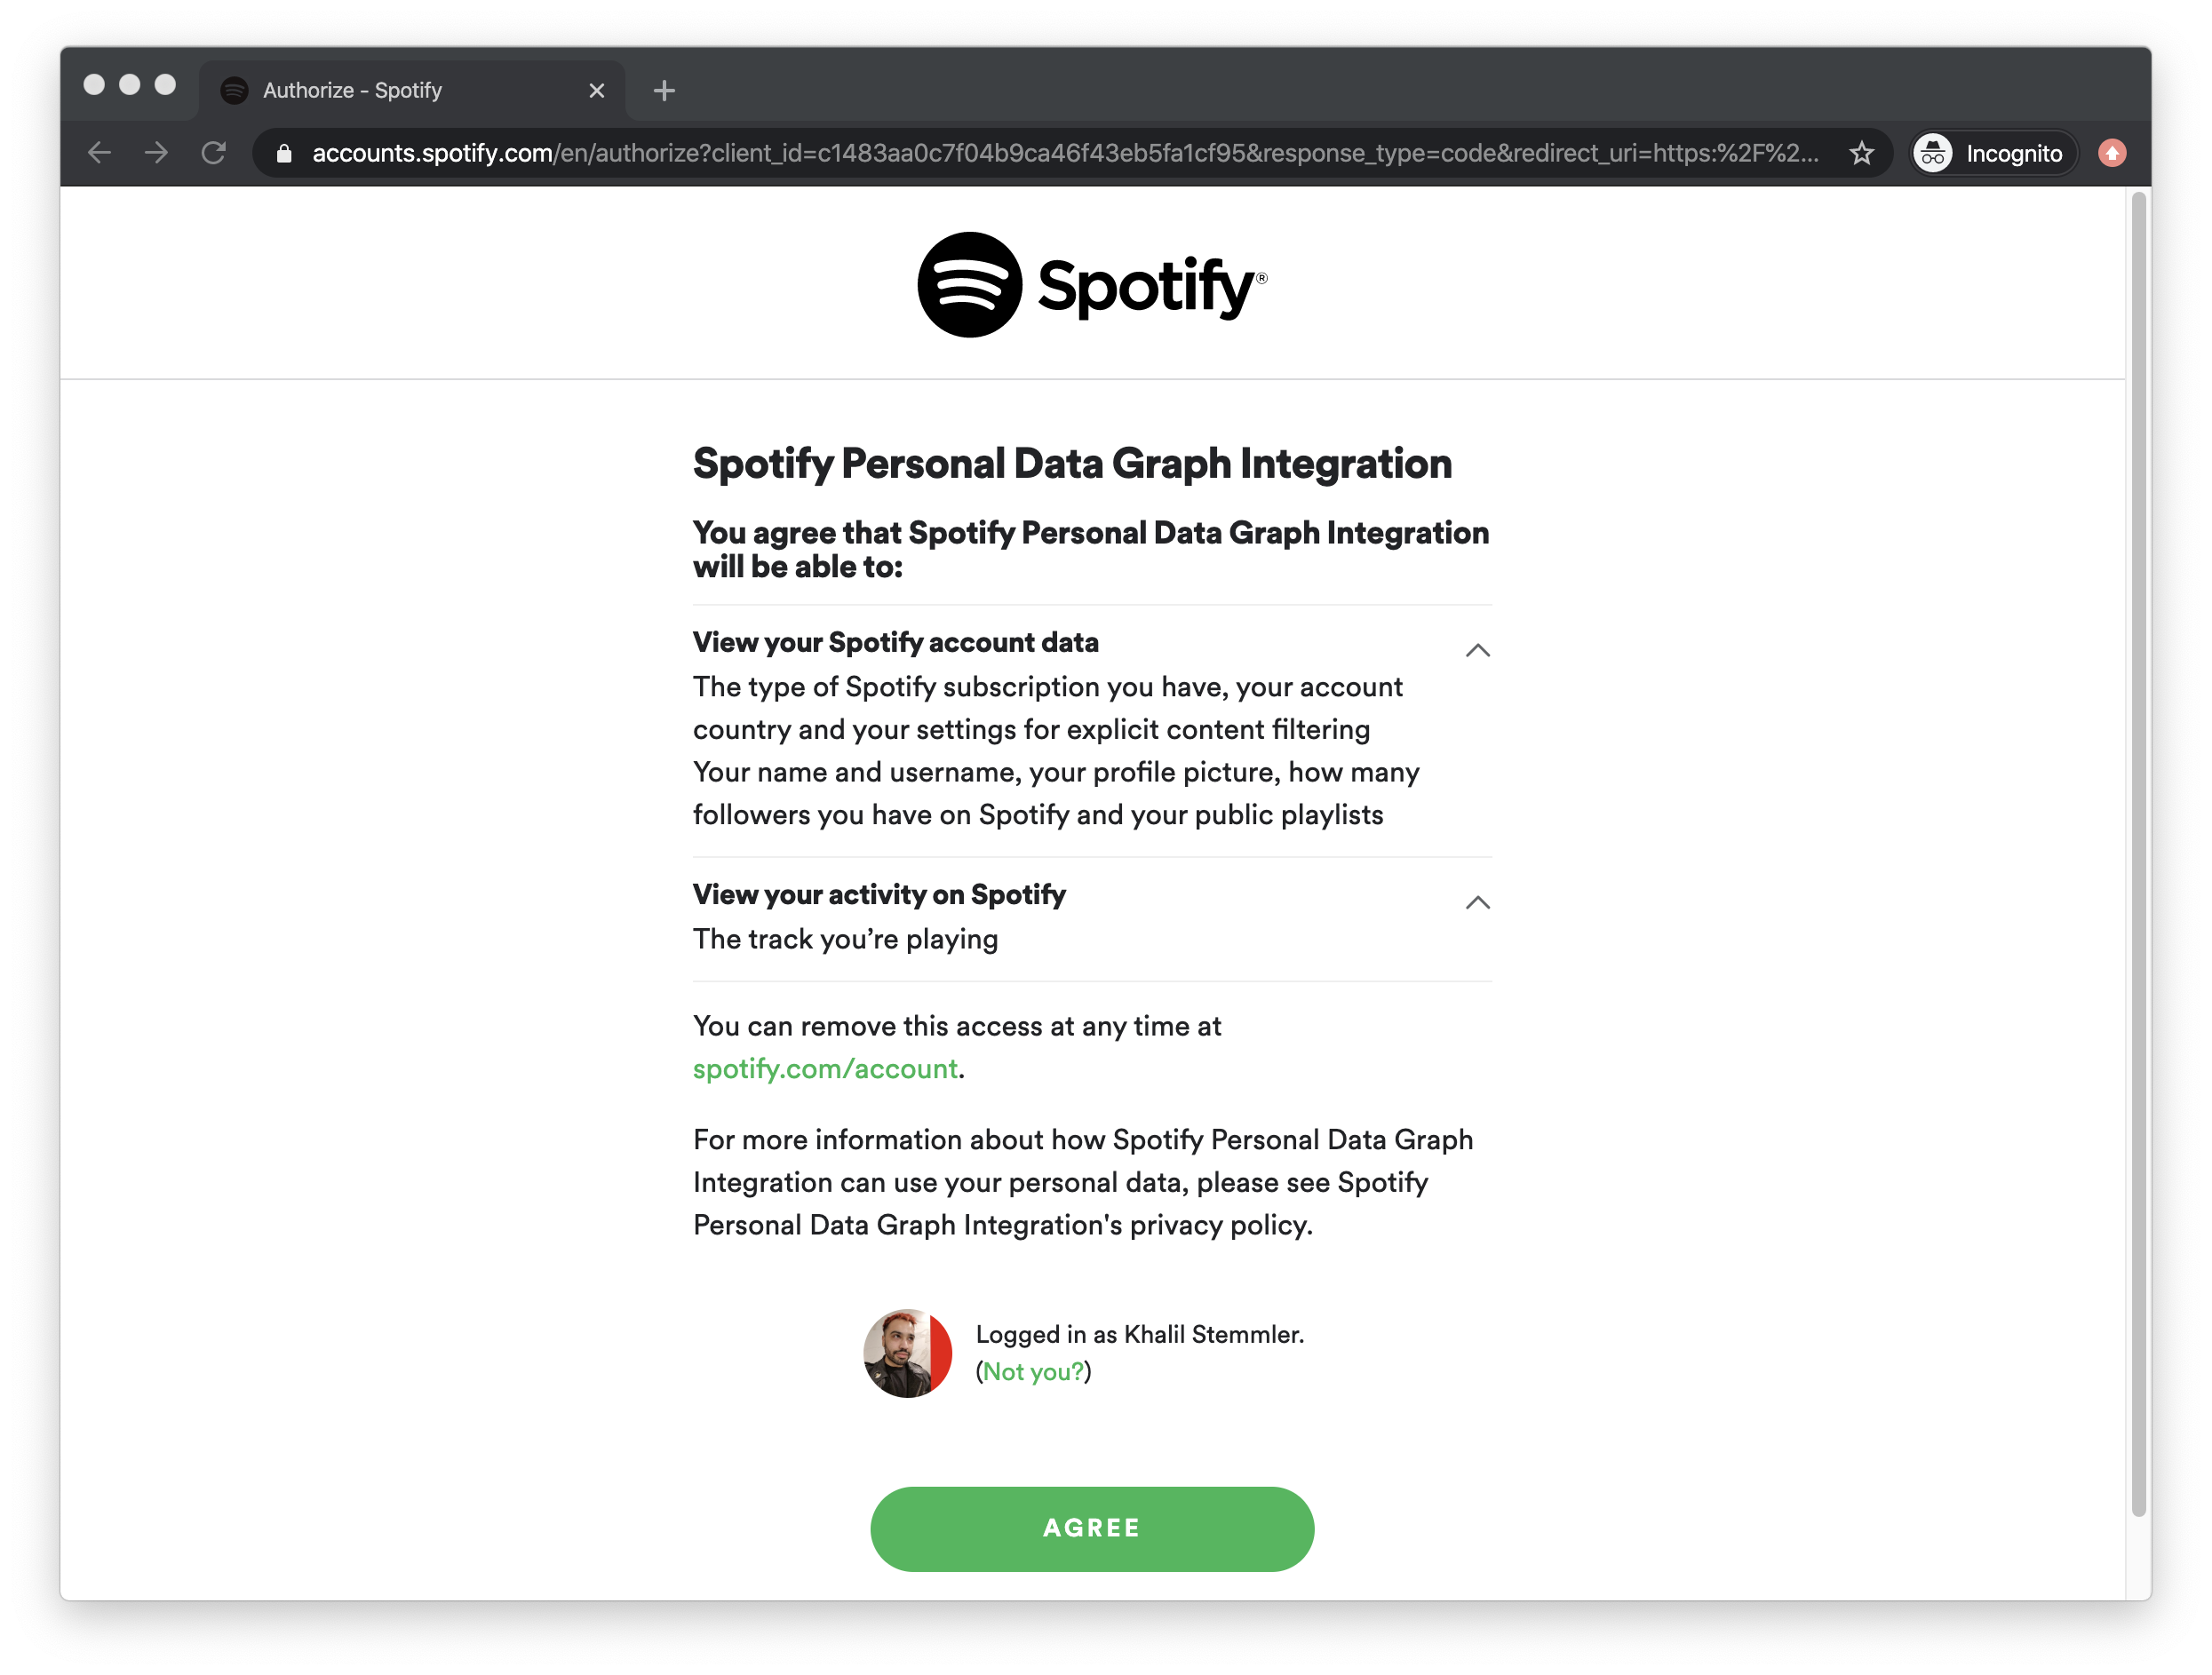
Take this URL and substitute your Client ID and Redirect URI, where I've placed PASTE_HERE, then paste the entire link into your browser.
https://accounts.spotify.com/authorize?client_id=PASTE_HERE&
response_type=code&redirect_uri=PASTE_HERE&
scope=user-read-private%20user-read-currently-playing
When you paste the link in your browser, you'll be asked to log in using your Facebook or email. Do that.
Successfully logging in will bring you to this page that asks you to confirm the type of data that we're asking for. The authorization scope that we're interested in is being able to see the user's currently playing song. Click "agree" here.
After clicking "agree", we'll get sent to the redirect URI that we passed in earlier, but with our authorization code as a code parameter in the resulting URL (check the URL bar).
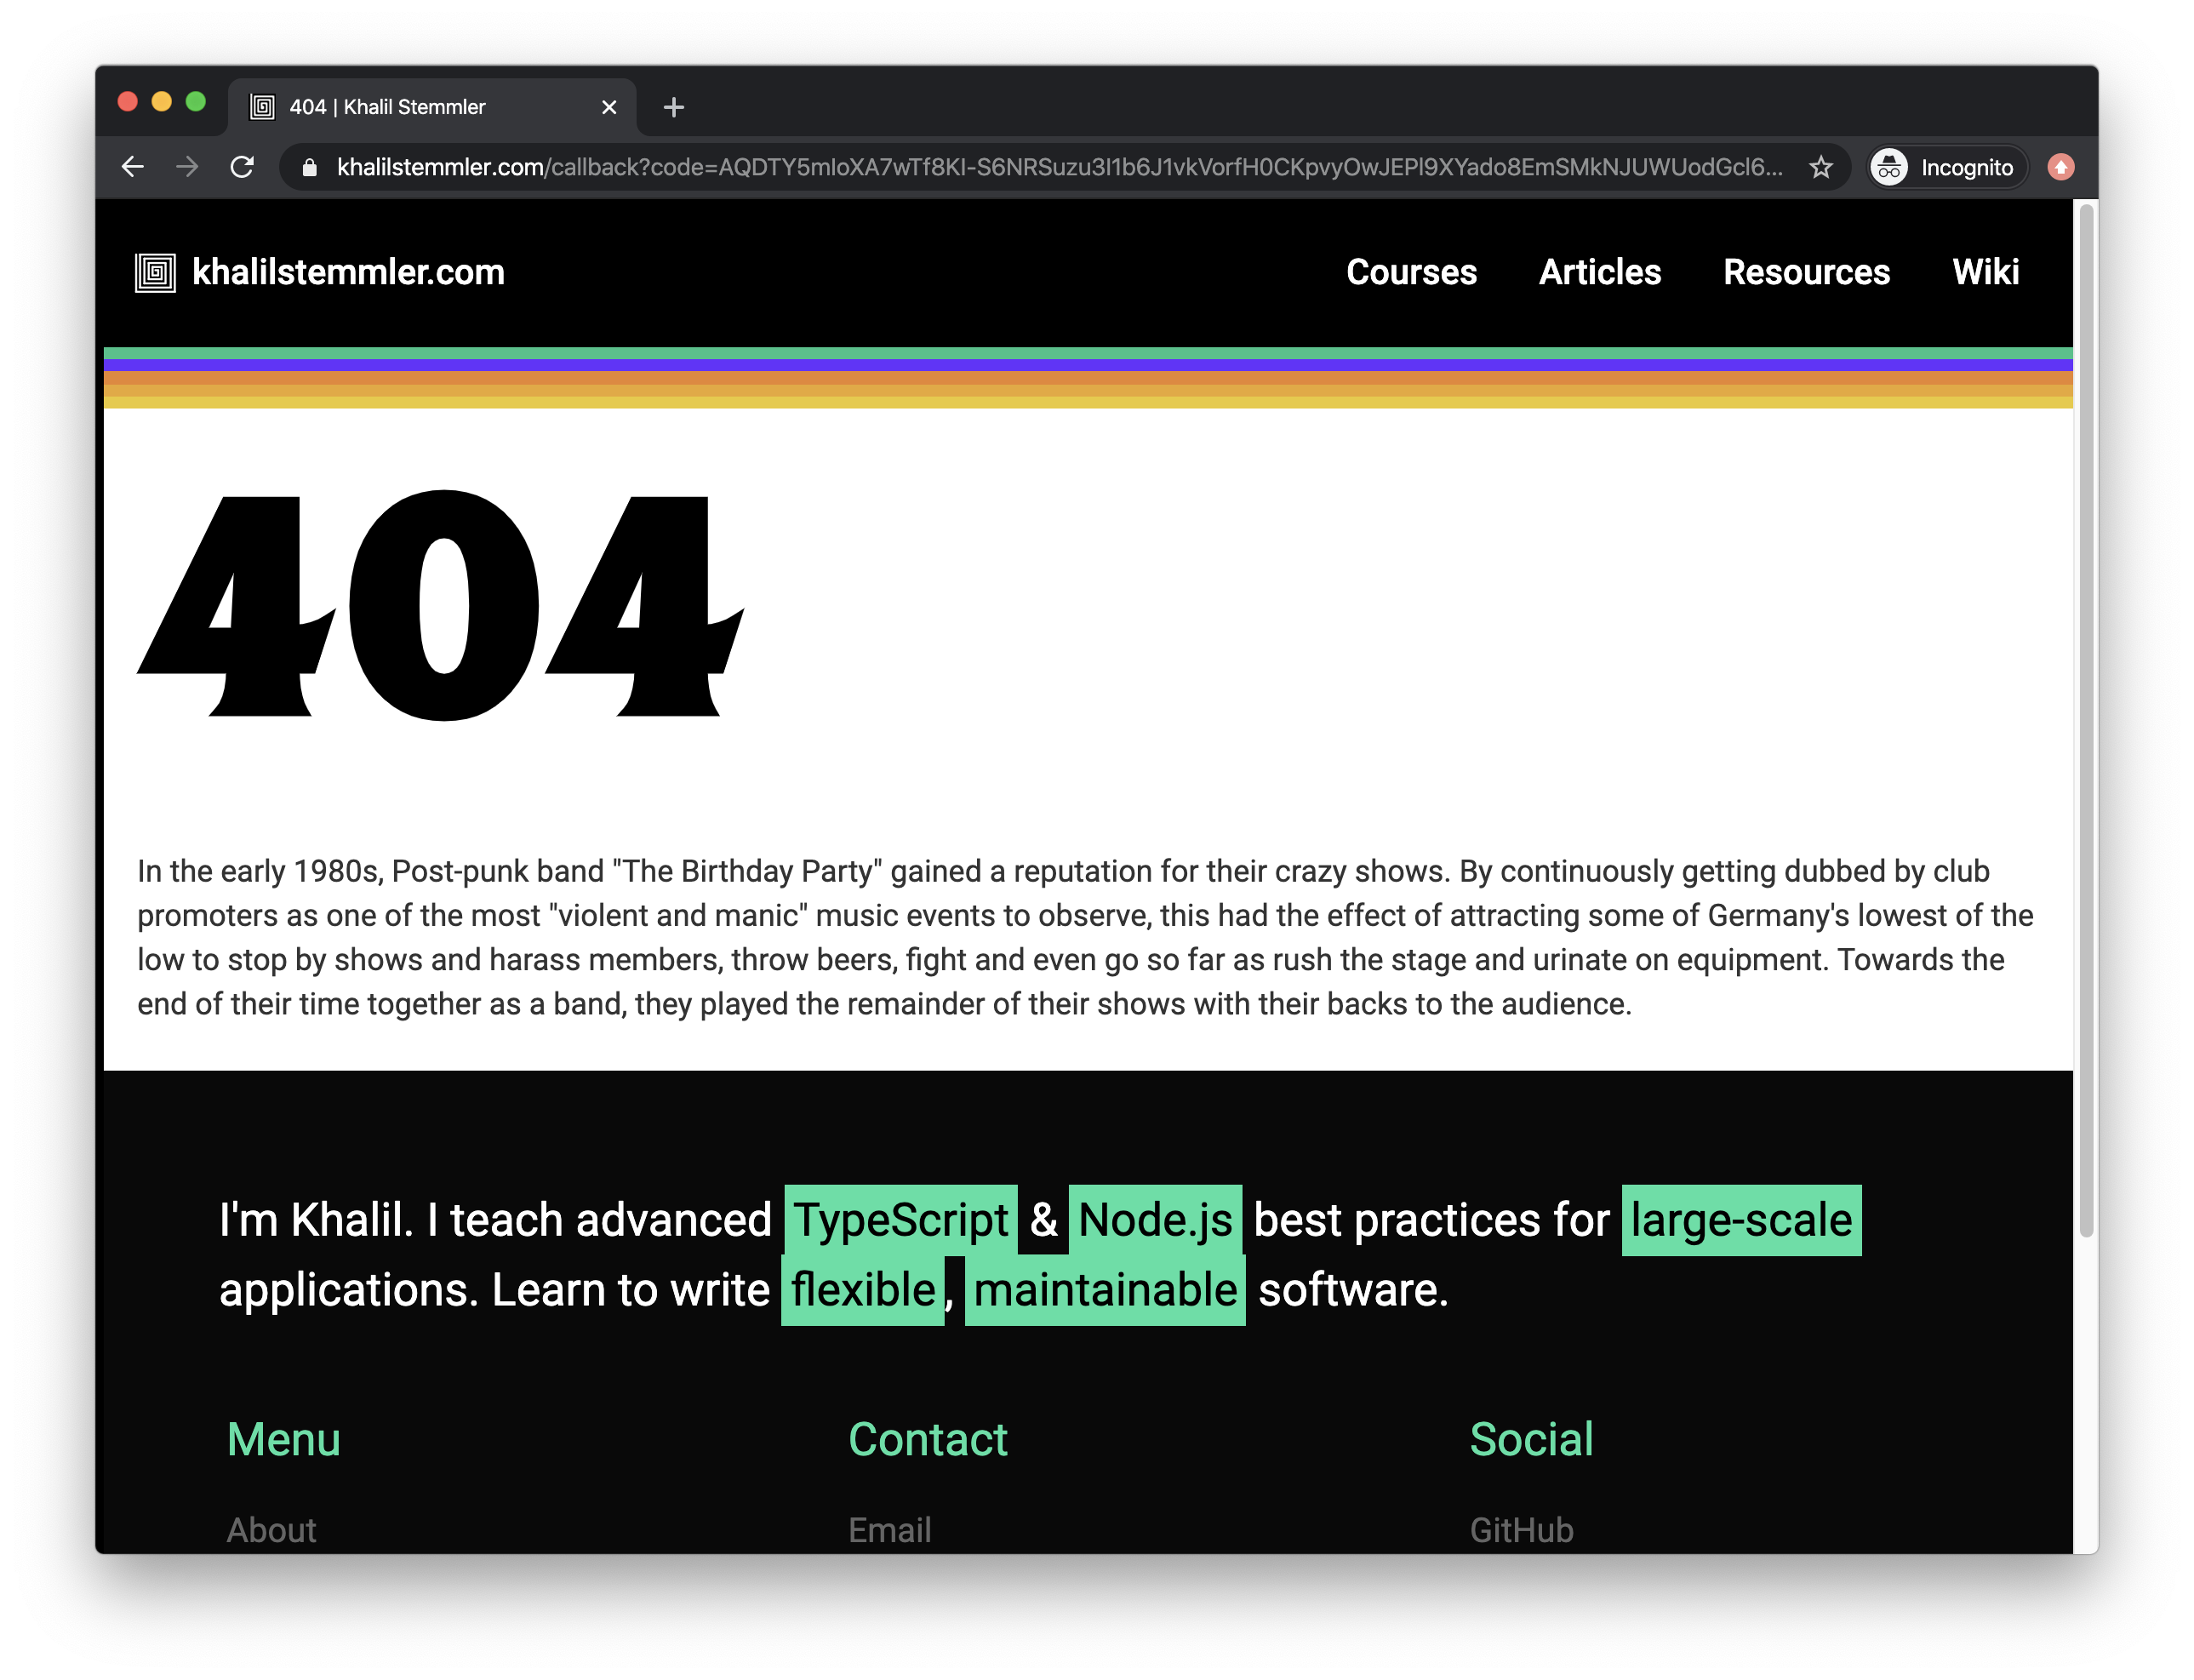
We're going to want whatever comes after ?code= in the URL, so copy that.
Using the Authorization Code to get an Access Token and the Refresh Token
In the root of the repository, run the following script with the code you copied from the URL.
npm run get-refresh-token <paste-your-code-here>This will ask for a permanent refresh token that we can use to make subsequent requests to the API and never have to worry about logging in again (that's dope).
If all goes well, console output should look like this.
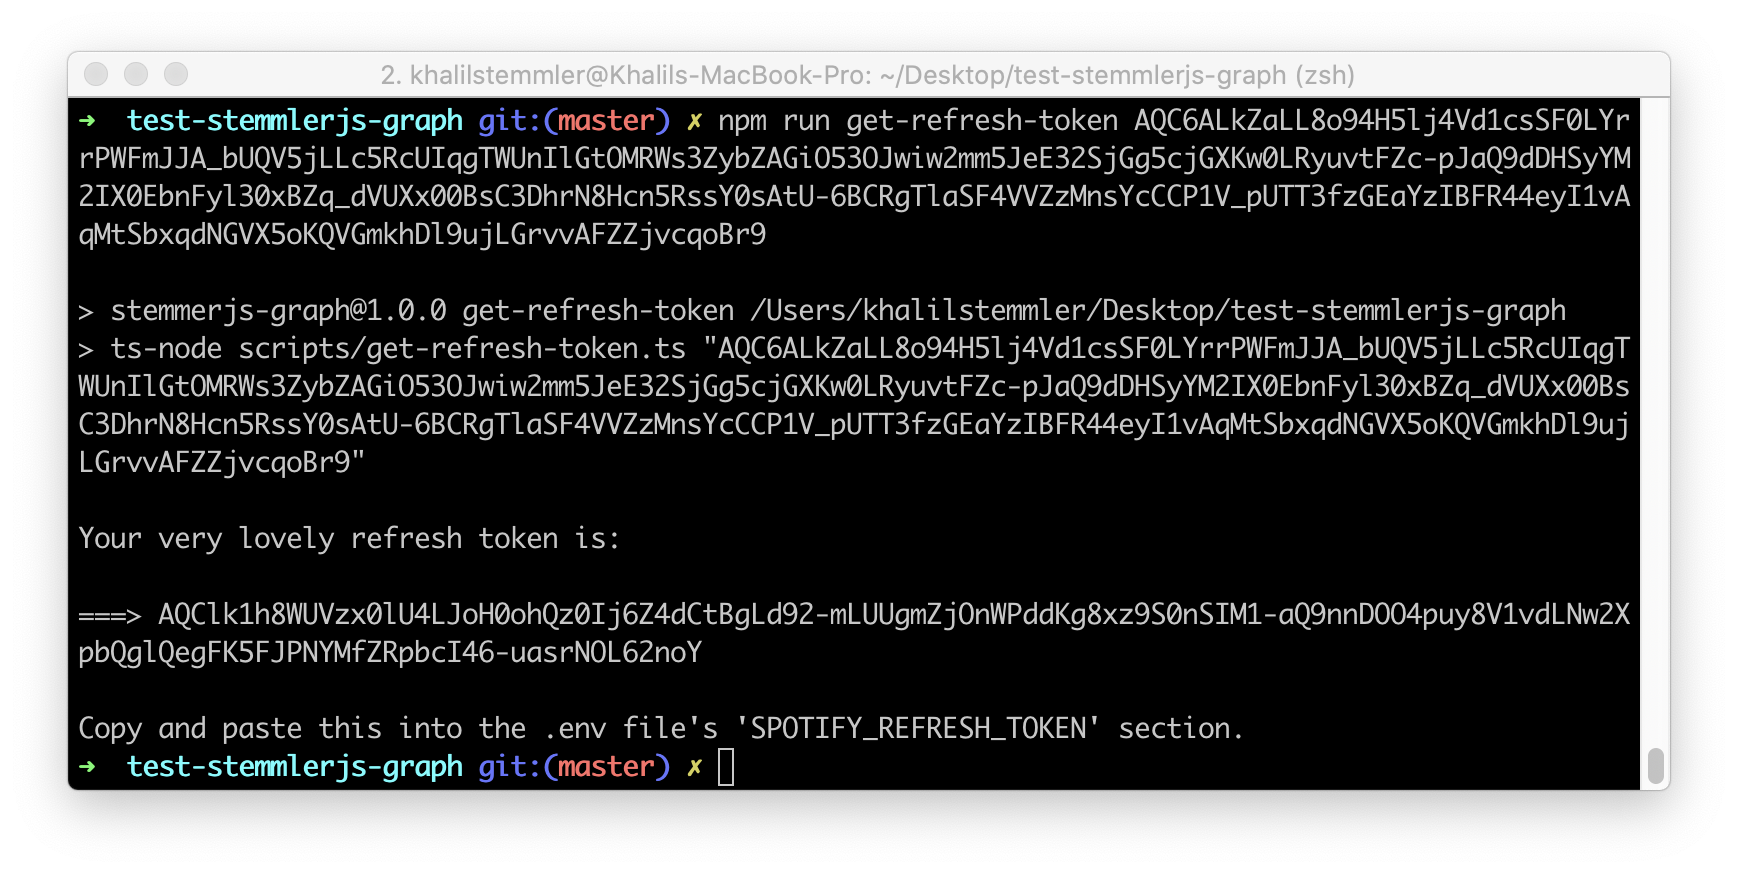
Copy the refresh token that was emitted to the console into the .env file.
...
SPOTIFY_REFRESH_TOKEN= # Paste the refresh token that we just got here
A couple of things to note if this doesn't work for you.
- You have to run this script within roughly a minute of getting the authorization code from Spotify. This is a security by opportunity- they reduce the total amount of time that someone can use that code hanging out in the open. If you get a 400 error, go back to Getting the initial Authorization Code and paste the link again to generate a new authorization code.
- It will also fail if you've forgotten to supply the
SPOTIFY_CLIENT_ID,SPOTIFY_CLIENT_SECRET, andSPOTIFY_REDIRECT_URLvalues. - The last reason this might fail is if you're not running Node version 10 or higher.
Getting the currently playing song via GraphQL Playground
In the repo, I've already gone and done all the hard work of setting up a GraphQL server, defining the schema, and mapping the API results to a song type.
The action happens in spotifyService.ts which you can peruse if you like.
If you'd like to play around with the graph via GraphQL playground, run:
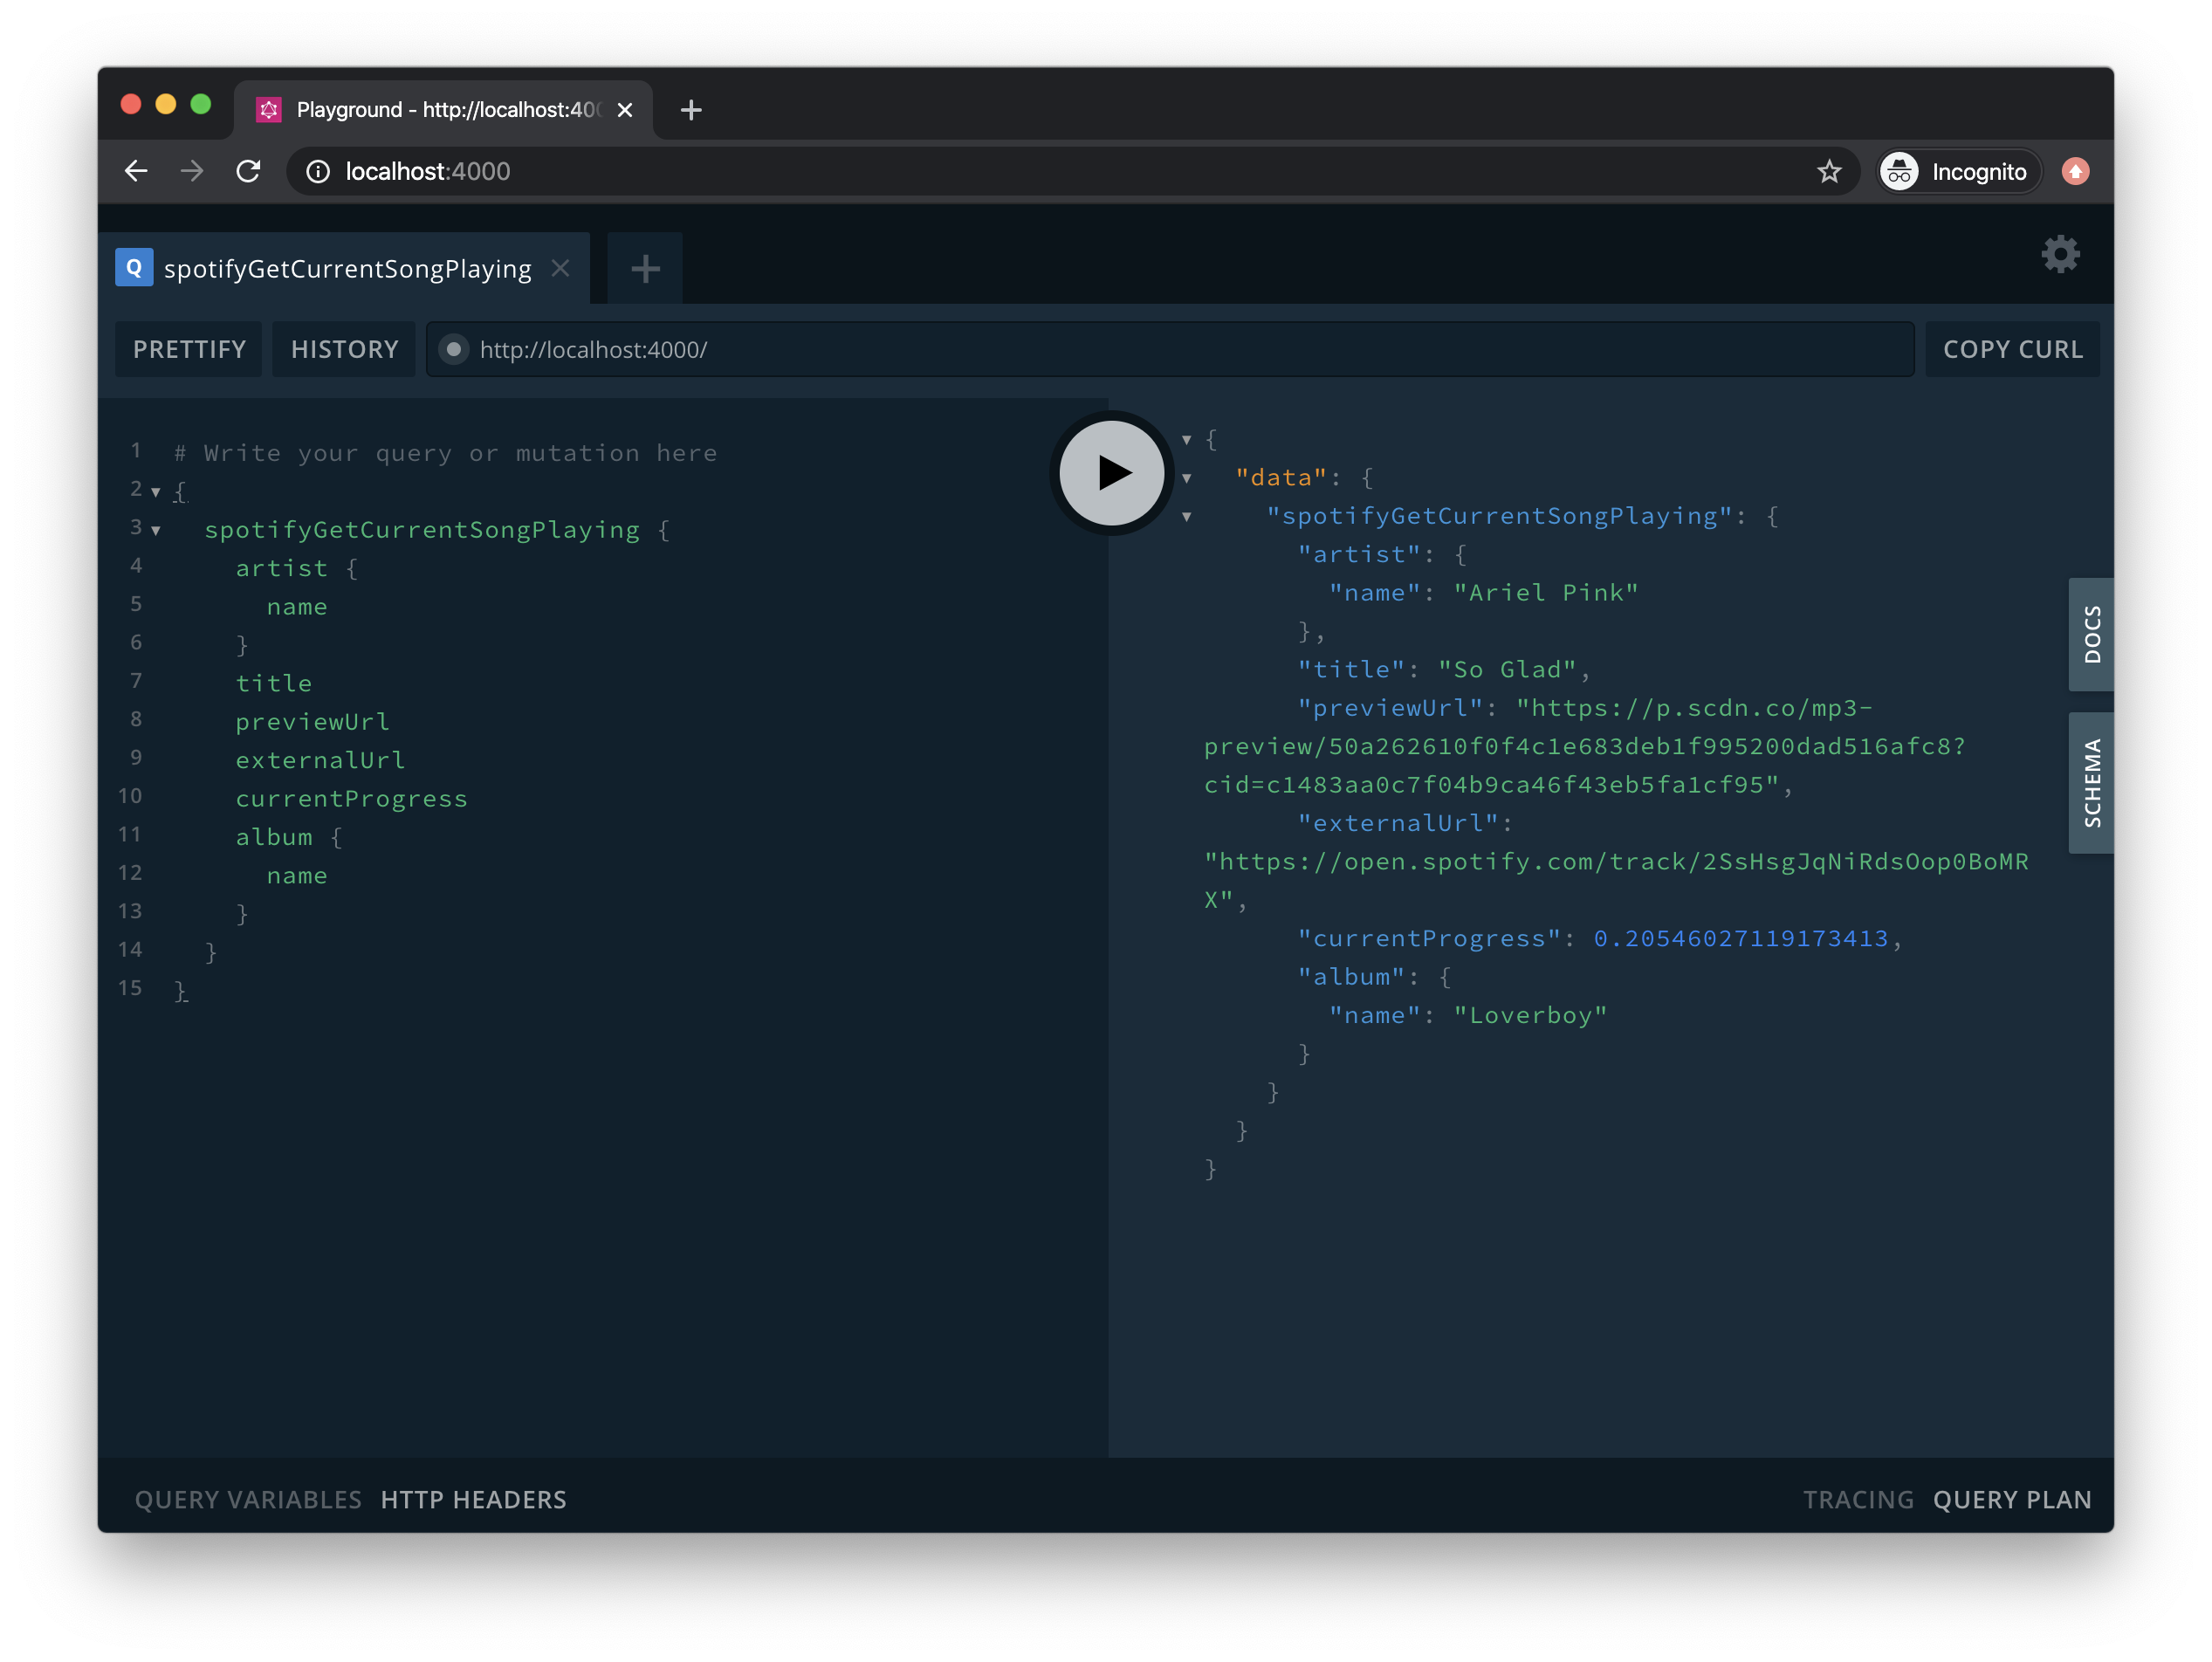
npm run startThen go to http://localhost:4000/, fire up your Spotify, play some music, and then run this query to see the results.
{
  spotifyGetCurrentSongPlaying {
    artist {
      name
    }
    title
    previewUrl
    externalUrl
    currentProgress
  	album {
      name
    }
  }
}
Voila!
If you're interested in my terrible music taste, pop over to stemmlerjs-graph.netlify.com and see what I'm listening to currently.
That's it! I hope this helps someone.
Not sure where you are on the path? Take the Phases of Craftship quiz — 7 questions, personalized results.
Stay in touch!
Join 20000+ value-creating Software Essentialists getting actionable advice on how to master what matters each week. 🖖
View more in Web Development